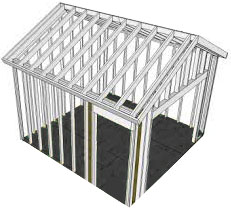
Building a shed is a rewarding project that can provide extra storage space, a workshop, or even a small retreat. This guide will walk you through the steps to build a sturdy and functional shed, complete with sketches to illustrate the process.
PLANNING AND PREPARATION
- DETERMINE THE PURPOSE AND SIZE
Before you start, decide the primary purpose of your shed. This will help you determine the size and design features needed. Common sizes range from 6x8 feet for a small garden shed to 12x16 feet or larger for a workshop.
2. CHOOSE A LOCATION
Select a flat, well-drained area for your shed. Ensure it’s accessible and meets any local zoning regulations or homeowners' association rules.
3. GATHER MATERIALS AND TOOLS
Here’s a list of materials and tools you will need:
MATERIALS:
- Pressure-treated lumber for the foundation
- Framing lumber (2x4s)
- Plywood or OSB for the floor and walls
- Siding (T1-11, vinyl, or wood)
- Roofing material (shingles or metal roofing)
- Screws, nails, and wood glue
- Doors and windows (optional)
TOOLS:
- Tape measure
- Level
- Hammer or nail gun
- Circular saw or miter saw
- Drill
- Square
- Shovel
- Ladder
- Safety gear (gloves, goggles)
BUILDING THE SHED
STEP 1: BUILD THE FOUNDATION
Here’s a basic sketch of the shed foundation layout.
- Prepare the Site: Clear the area of debris and level the ground. Mark the shed's footprint using stakes and string.
- Install the Foundation: There are several types of foundations you can use:
Concrete Blocks: Place concrete blocks at the corners and along the perimeter. Ensure they are level and spaced correctly.
Concrete Slab: Pour a concrete slab for a permanent foundation.
- Wooden Skids: Use pressure-treated 4x4 or 4x6 skids for a movable foundation.
STEP 2: BUILD THE FLOOR FRAME
Floor framing layout.
- Construct the Floor Frame: Use 2x6 or 2x8 lumber to create a frame that fits the shed’s dimensions. Space the joists 16 inches apart and secure them with nails or screws.
- Attach the Floor: Cover the frame with ¾-inch plywood or OSB, securing it with screws.
STEP 3: BUILD THE WALLS
Wall framing layout.
- Construct the Wall Frames: Build the wall frames using 2x4 lumber. Ensure the frames are square and the studs are spaced 16 inches apart.
- Install the Walls: Erect the wall frames one at a time, securing them to the floor and to each other at the corners. Use temporary braces to hold the walls in place.
STEP 4: ADD SIDINGS AND WINDOWS
- Attach Siding: Install your chosen siding material (T1-11, vinyl, or wood) to the wall frames. Make sure to cut out openings for windows and doors.
- Install Windows and Doors: Fit windows and doors into the pre-cut openings, securing them with screws and caulking around the edges to seal them.
STEP 5: BUILD THE ROOF
- Construct the Roof Frame: Build the roof trusses or rafters using 2x4 lumber. Ensure they are evenly spaced and secure them to the top plates of the wall frames.
- Attach the Roof Sheathing: Cover the roof frame with plywood or OSB, securing it with screws.
- Install Roofing Material: Apply roofing felt, then install shingles or metal roofing according to the manufacturer’s instructions.
STEP 6: FINISH THE SHED
Completed shed with all components.
- Add Trim and Paint: Install trim around doors, windows, and corners. Paint or stain the shed to protect it from the elements and enhance its appearance.
- Install Flooring (Optional): If desired, install additional flooring material like vinyl or laminate inside the shed.
TIPS FOR A SUCCESSFUL SHED BUILD
- Follow Local Codes: Ensure your shed complies with local building codes and obtain any necessary permits.
- Quality Materials: Use high-quality, pressure-treated lumber and weather-resistant materials to ensure your shed's longevity.
- Accurate Measurements: Double-check all measurements and use a level to keep everything straight and square.
- Safety First: Wear appropriate safety gear and work cautiously, especially when using power tools and working at heights.
Building a shed is a manageable project for most DIY enthusiasts and can be a valuable addition to your property. With careful planning, the right materials, and attention to detail, you can create a shed that meets your needs and stands the test of time.
😁 Happy building! 😁
————————————————————————————
While every effort has been made to check the accuracy of this article, readers should always make their own checks.
The Author does not accept any responsibility for misstatements made or any misunderstandings arising from the information provided.
————————————————————————————


No comments:
Post a Comment